Dough rises as yeast produces gas and the dough retains it. The clock gives an estimate, but dough temperature, yeast quantity and the recipe’s ingredients change the pace. Judge each rise by the recipe’s visual and physical cues as well as elapsed time.
Step by step
Record the starting size
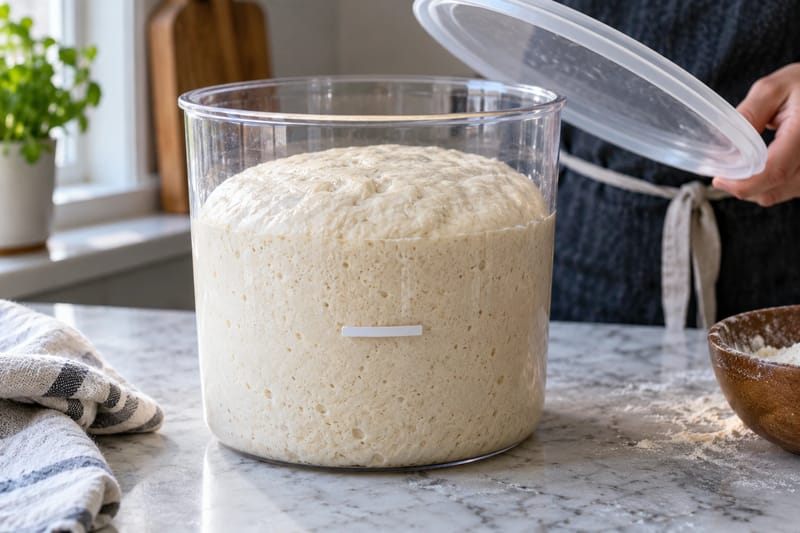
Put the dough in the container specified and note its initial height. A straight-sided clear container makes expansion easier to see. Cover as directed so the surface does not dry into a skin.
Use the intended proving conditions
Choose the recipe’s room-temperature or refrigerated method. Keep dough away from direct heat. A hot oven or radiator can overheat the surface while the centre remains cooler.
Check the first rise by expansion
Look for the increase in volume and aeration the recipe describes. Not every dough should double at every stage. Shape at the prescribed point, then cover the shaped dough for its final prove.
Check the shaped dough gently
For a suitable wheat dough, a lightly floured fingertip pressed gently into the surface can help: quick spring-back often indicates more time is needed, while a slower partial return suggests it is closer. Interpret this alongside visible puffiness and the recipe, particularly for cold or very soft dough.
Slow rising or collapse
Cold dough rises more slowly. Give it time under suitable conditions before assuming the yeast has failed. Fragile dough that deflates easily may have risen too far; follow a recipe-specific recovery method rather than repeatedly poking it. Gluten-free and high-rye doughs need their own cues and may not respond like an elastic wheat dough.